RustProofing.Wales
Introducing Rustoust
Restore & Protect
The ultimate in underside treatments for your Vehicle.
Over a decade of experience and development in a process that is fully guaranteed to work.
Terms & Conditions of business and important information can be found on the link in the footer of this page.
FREE, No Obligation Initial Assessment & Advice
It's a really good starting point, pop in for simple, no nonsense guidance on the current condition of your vehicle and an accurate estimate for what is needed.
Free Assessment
Preparation |
RustRepairs |
RustProofing |
Cavity Wax |
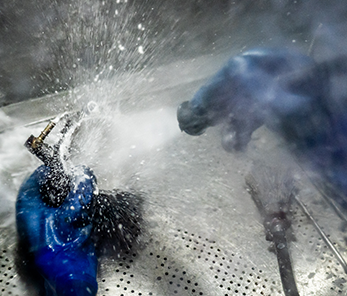
If it can corrode, it can be RustProofed!
For Your Vehicle
We've treated a wide range of vehicles over the years from classic cars to vintage trailers and similar. Our only limitation is the size and weight as we have to be able to lift the vehicle in the air to access the underside properly. We're offering an extensively developed treatment, tried and tested with a comprehensive guaranteed warranty.
We offer a full range of RustProofing related work
Services
We offer the complete package from pre-treatment preparation, RustRepairs & the RustProofing treatment through to Cavity Wax Injection, Shot Blasting & Vapour Blasting. Our workshop is set up to provide the ultimate in underside restoration. All our workmanship is done to a high standard & has a fully guaranteed warranty.
What We Do Better
Why Use Us
Get in touch, we'd love to hear from you
Contact Us
How does the pricing work?
Put simply, the bill you get for the work done is a simple calculation of the labour time spent doing the job plus all the products and consumables used in the process. You receive a breakdown of this on the paperwork too. Obviously until we do the job, we can't be entirely sure how long we will need to spend or how much product will be used.
There are guide prices and further costing information for each type of vehicle on the individual pages of the "For Your Vehicle" section.
Labour Time
Labour required to do the job can be affected by several variables including the amount of preparation required on your vehicle, whether repairs are needed, the size of the vehicle, how many undertrays or trims need to be taken off and put back on, how much masking and cleaning is needing, whether you've asked for extras & finally choice of products.

Products & Consumables
Some of the consumables (soap, sand, discs etc) are simply billed on a flat rate per job to cover the cost of these. Similarly when there are repairs there is a flat rate charge to cover the welding gas and sundries. However the products themselves are billed directly from the quantities actually used on your vehicle.
Estimates, Quotations & What You Pay!
Important Things To Note About Pricing
We cannot offer fixed pricing for our rust treatments. This is because there are so many variables on this process. Understandably we need to be paid for any labour time spent on your vehicle and any products we use on your vehicle.
A guide price should in no way be considered as an estimate or quotation! Guide pricing is just that, a guide price based on the average bills for a percentage of previous jobs done. For anything more accurate you need to attend for the FREE Initial Assessment so we can see what we're dealing with.
At your FREE Initial Assessment we will likely give you either a more accurate GUIDE PRICE based on what we've seen under your car or a verbal ESTIMATE (written if preferred, just ask). An estimate is an approximate calculation of the expected price we can offer you the work anticipated for. This is not a fixed price and is subject to variations, however almost all work invoiced will match or be very close to the estimated price.
We cannot offer a QUOTATION (verbal or written) as quotations only apply to work that can have an agreed fixed price.
Why are there so many variables? Simply because until the preparation commences it is impossible to be certain that there isn't hidden stage 3 corrosion that hasn't been apparent during the visual assessment. What looks like flaky surface rust can be hiding a nightmare. Similarly although we are good at estimating the product quantities needed, there may be an extra litre or so needed.
Naturally, the more rust there is and the greater the repairs needed are, the higher the costs will be. We can stop the process at any point and you can decline further repairs, we will only bill the labour to that stage. Obviously once we start the preparation, any holes that appear can't be magically undone unfortunately. By booking in and leaving the car you accept that any holes mades during preparation are to be expected.
The all important "FROM" before the guide pricing references that this is the cheapest we have been able to provide the service. The bigger your vehicle, the more time and product required to treat it so expect a higher price if you have a van for example! The best way to get a price that's actually relevant to you and your vehicle is to pop in for the FREE assessment.
The RustOust Team Rustproofing Limited
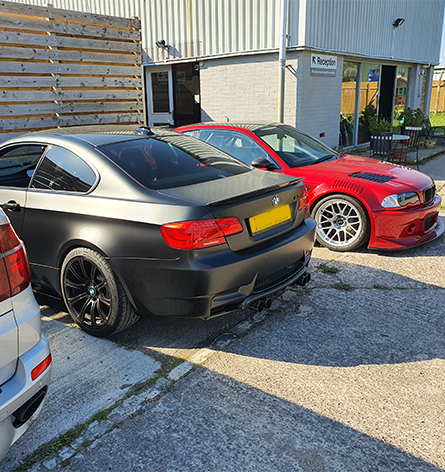
Some examples of our work
Case Studies
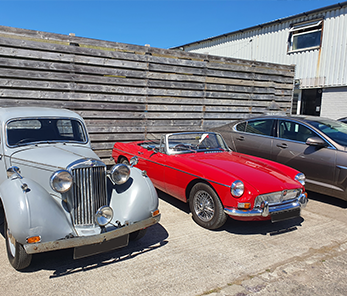
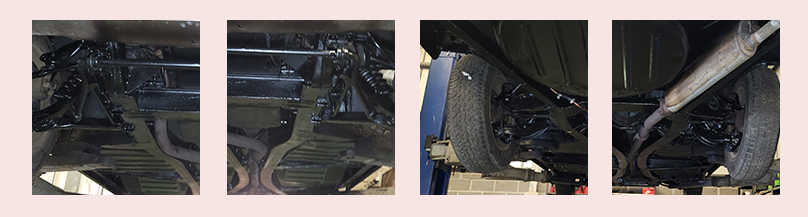
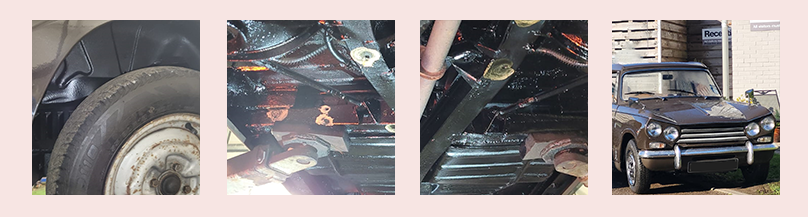
- Triumph Vitesse 1971
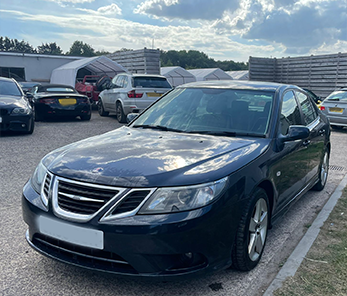
- Range Rover Sport 2006
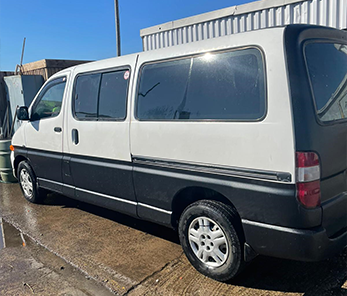
- VW Transporter 1988
- Mazda MX-5 2003
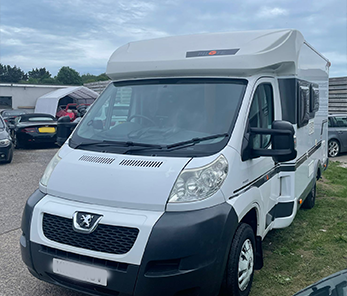
- Peugeot Elddis 2020
- Mercedes S320L 2000
- TVR Chimaera 1998
- Ford Transit 2002
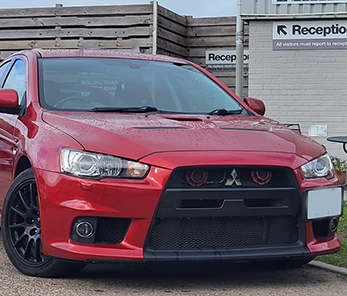
- Subaru Impreza 2006
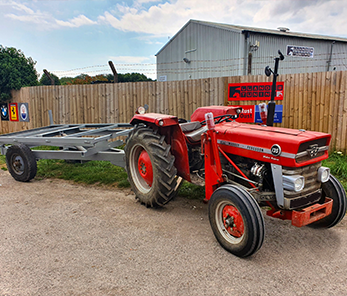
- Massey Ferguson Cart
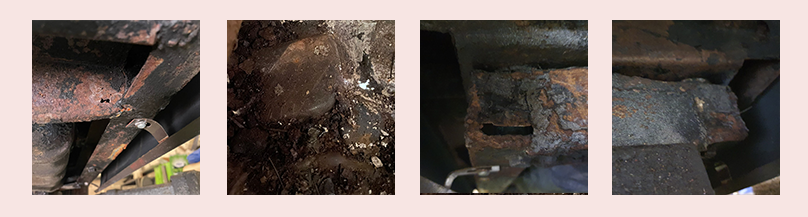
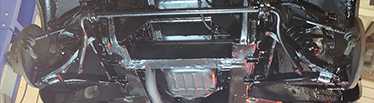
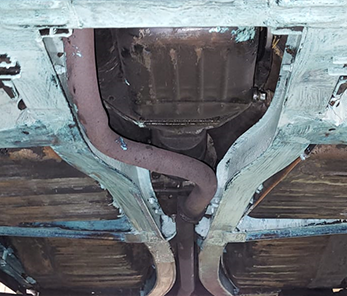
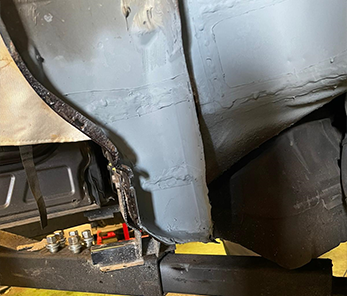
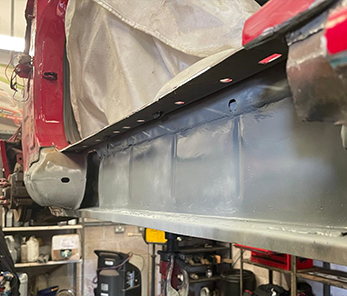
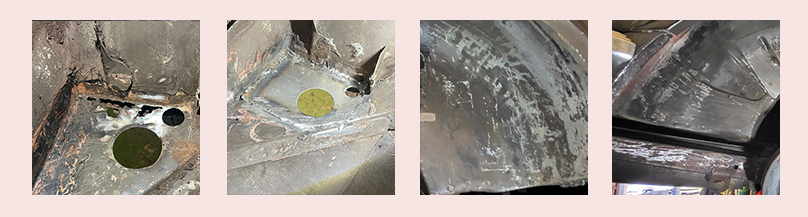
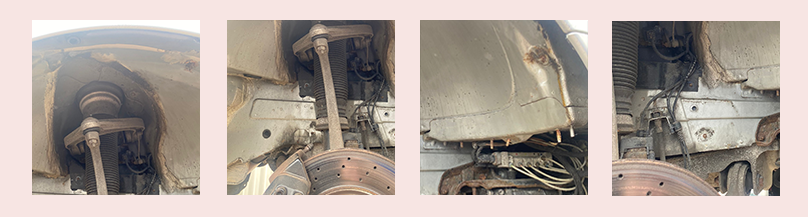
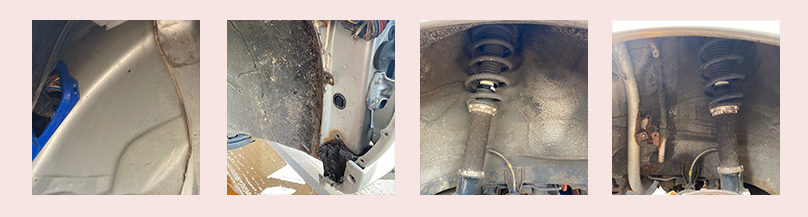
We spent a good full two days just on the preparation and repairs. The repairs involved removing the fuel tank since obviously it's not an option to weld under a tank full of petrol! Once repairs were complete and coated with seam sealer and zinc primer, and we'd done all the grinding, air needling and wire brushing, we then coated the relevant areas with rust converter. Here's some Repairs & Preparation Pictures:
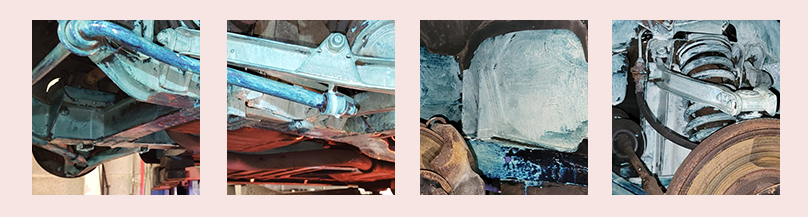
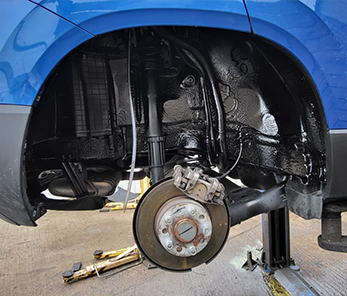
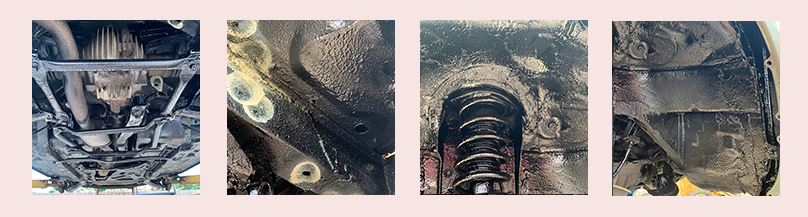
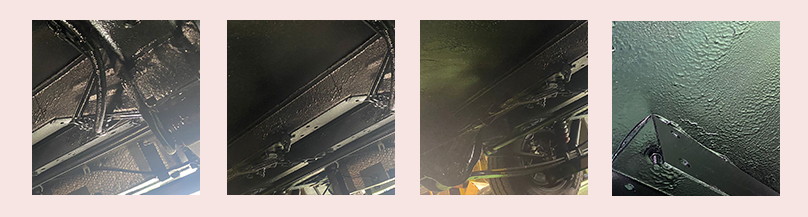
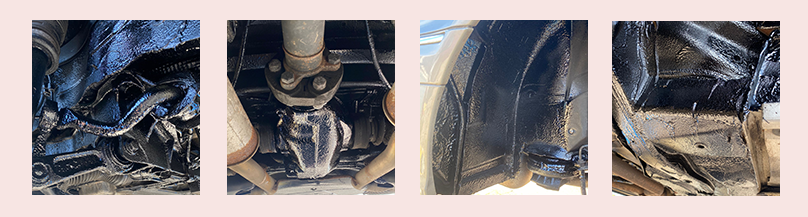
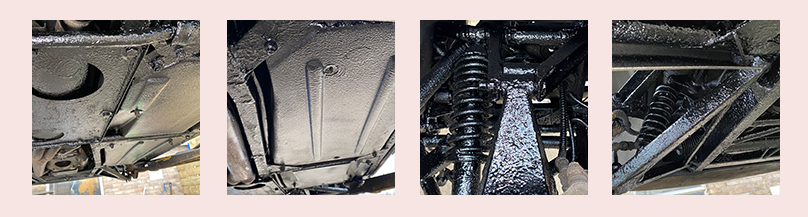
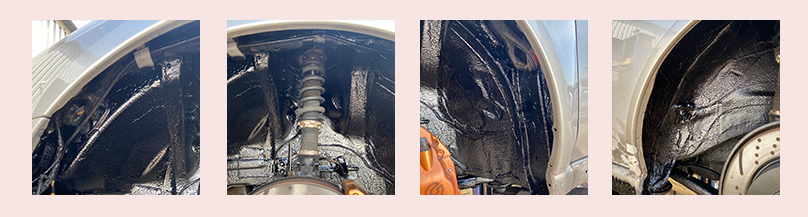
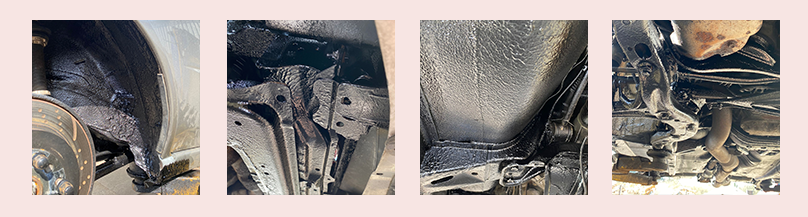
Once all fully dried we applied our rustproofing treatment process and then cavity wax injected wherever possible. Vehicle allowed to dry before a bath to get ready to go home. Here's some Post Treatment Pictures:
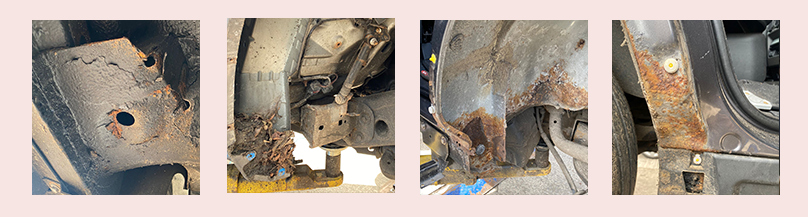
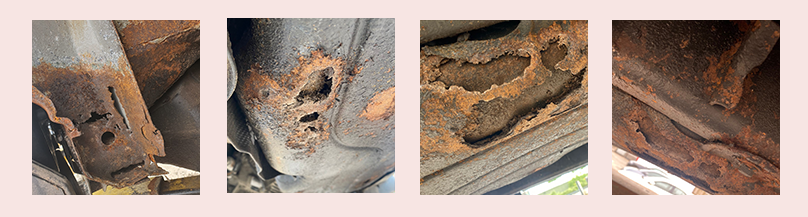
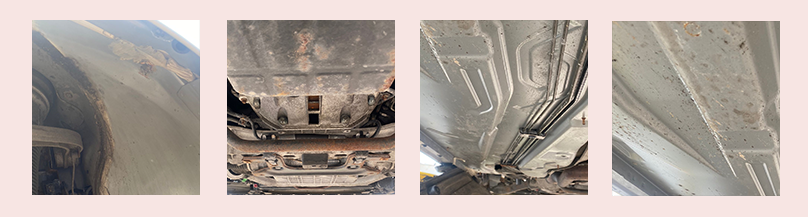
We spent nearly four days just on the preparation and a good week doing repairs. The repairs involved some fabrication of repair sections, plenty of patches to be made and plenty of smaller repairs too! Once repairs were complete and coated with seam sealer and zinc primer, and we'd done all the grinding, air needling and wire brushing, we then coated the relevant areas with rust converter. Here's some Repairs & Preparation Pictures:
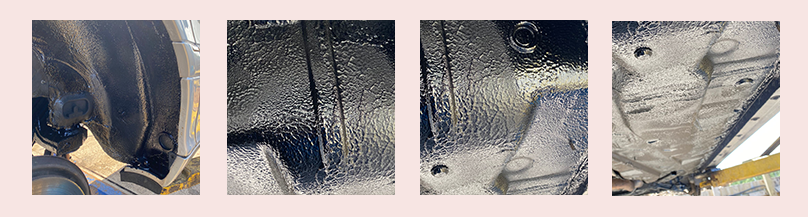
Once all fully dried we applied our rustproofing treatment process and then cavity wax injected wherever possible. Vehicle allowed to dry before a bath to get ready to go home. Here's some Post Treatment Pictures:
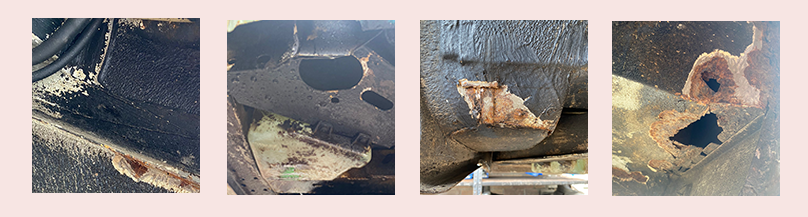
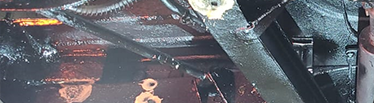
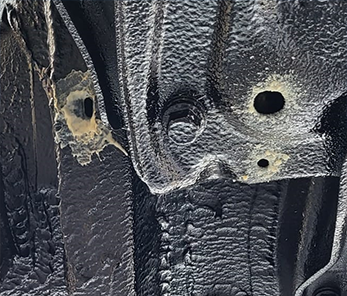
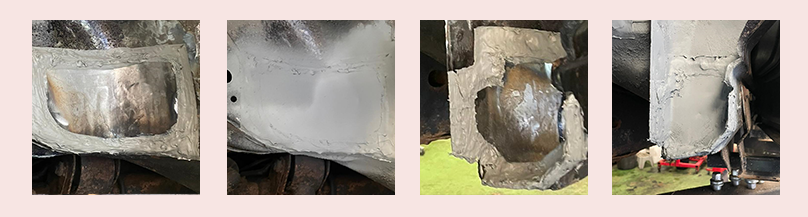
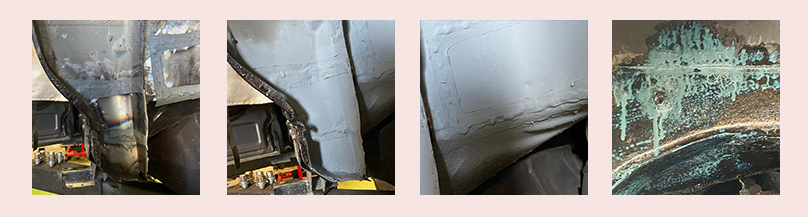
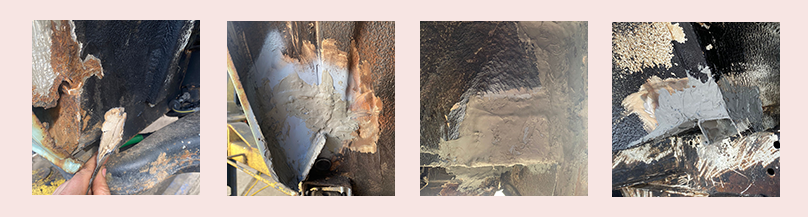
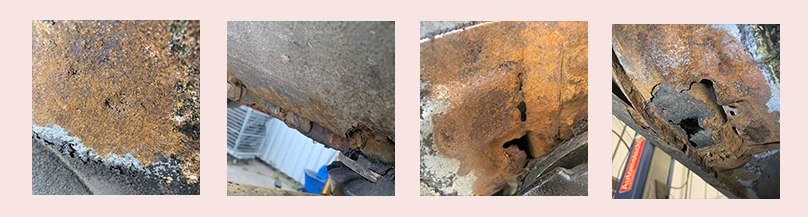
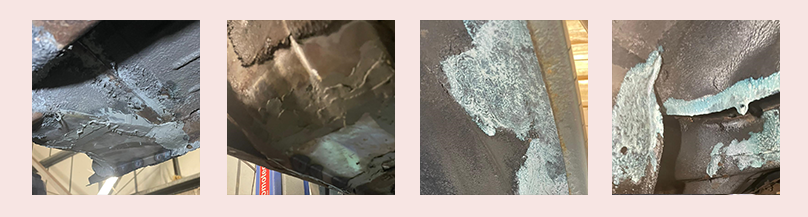
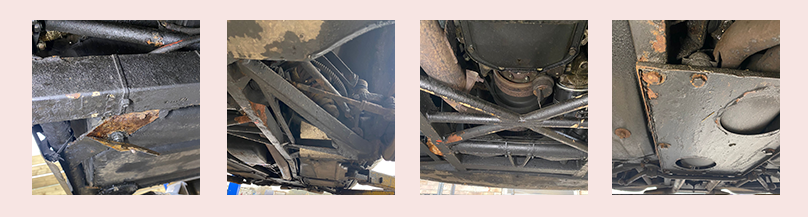
We spent nearly a full week just on the preparation, getting off the old failed black underseal and removing the bad metal ready for repairs. Then we spent another week and a bit doing the repairs themselves. The step and floorwells at the front were rotten and needed a good section cutting out and new metal put in. This was zinc primered and raptor painted for the inside (under carpet) finish and zinc primered and seam sealed underneath before the treatment was applied. The first photo on the third row below is of a particularly poor previous repair we had to cut out and redo properly, it had been filled with cardboard of all things! Once repairs were complete and well coated with seam sealer and zinc primer to protect we prepared the whole underside for the treatment. Here's some Repairs & Preparation Pictures:
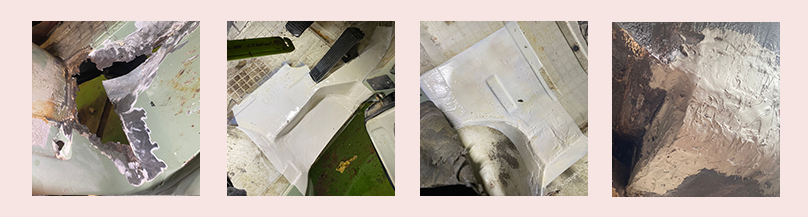
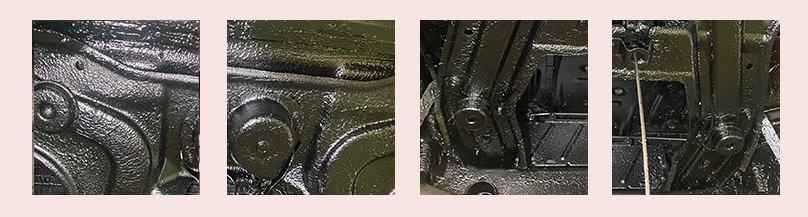
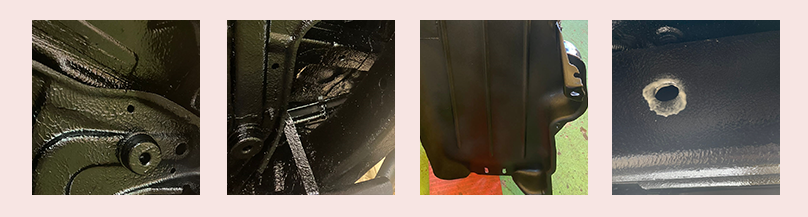
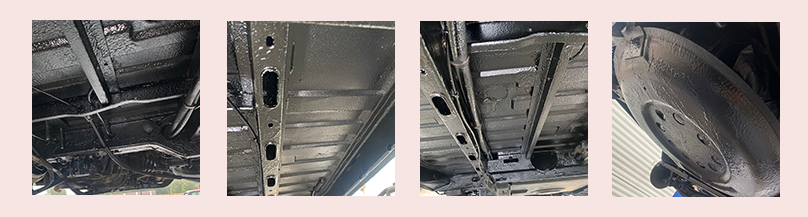
Once all fully dried we applied our rustproofing treatment process and then cavity wax injected wherever possible. Vehicle allowed to dry before a bath to get ready to go home. Here's some Post Treatment Pictures:
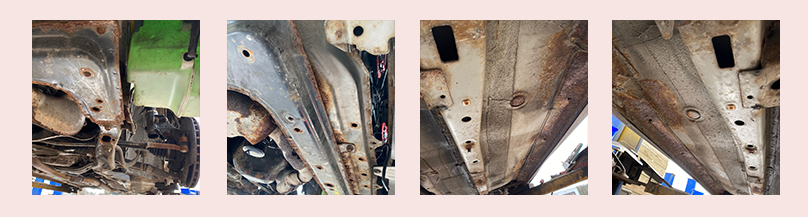
Most of the underside and arches were very easy to prepare and get ready for the treatment with a few areas needing some rust converter after blasting and grinding. However we needed to spend a couple of days getting rid of the rot in the sills and fabricating repair sections. Here's some Repairs & Preparation Pictures:
Once all fully dried we applied our rustproofing treatment process and then cavity wax injected wherever possible. Vehicle allowed to dry before a bath to get ready to go home. Here's some Post Treatment Pictures:
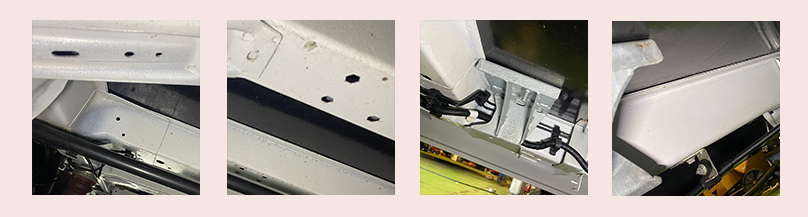
Obviously this one didn't need any preparation beyond a good hot clean to remove any dirt, debris or salt before applying the treatment.
Once all fully dried we applied our rustproofing treatment process and then cavity wax injected wherever possible. Vehicle allowed to dry before a bath to get ready to go home. Here's some Post Treatment Pictures:
This one didn't need too much preparation beyond a good hot clean to remove any dirt, debris or salt and a slight wire brushing to remove the small patches of very light surface rust. Then we applied rust converter on those areas before applying the treatment.
Once all fully dried we applied our rustproofing treatment process and then cavity wax injected wherever possible. Vehicle allowed to dry before a bath to get ready to go home. Here's some Post Treatment Pictures:
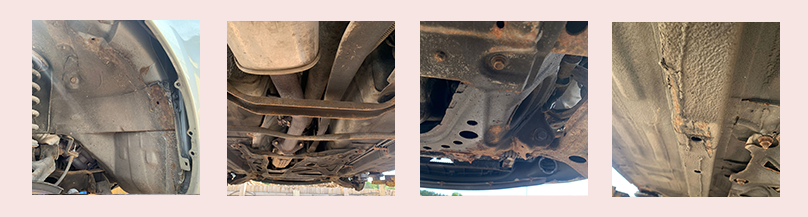
Obviously with the body shell being fibreglass the arches etc don't require any treatment, its the all-important chassis we were focussing on. Sadly there were some repairs needed to the corner sections which in an ideal world the body would be lifted off to access the top of the chassis but on this occasion we focused our efforts on the underside accessible sections. Most of the underside was prepared by removing the flaking old underseal with some areas needing rust converter after blasting and grinding. The repairs were actually a little complex as they were to tubular corner sections but we were satisfied with the end results. Here's some Repairs & Preparation Pictures:
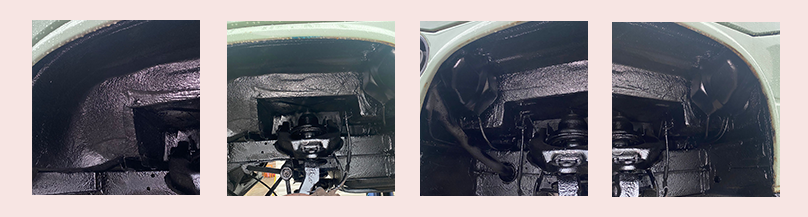
Once all fully dried we applied our rustproofing treatment process and then cavity wax injected wherever possible. Vehicle allowed to dry before a bath to get ready to go home. Here's some Post Treatment Pictures:

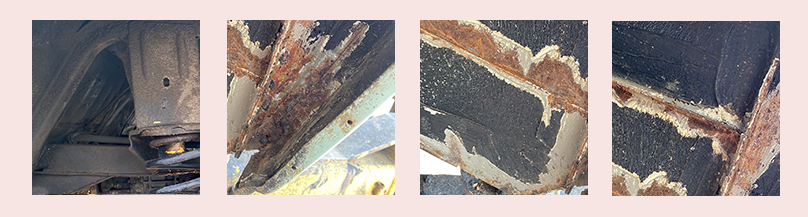
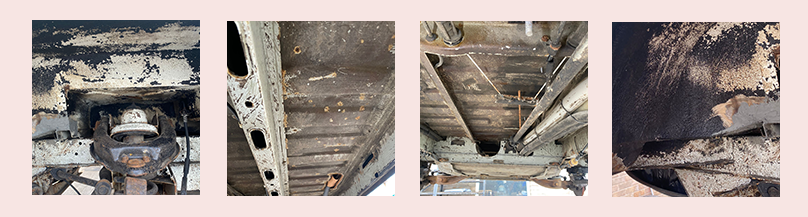
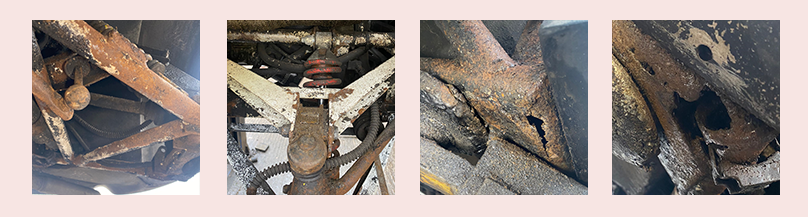
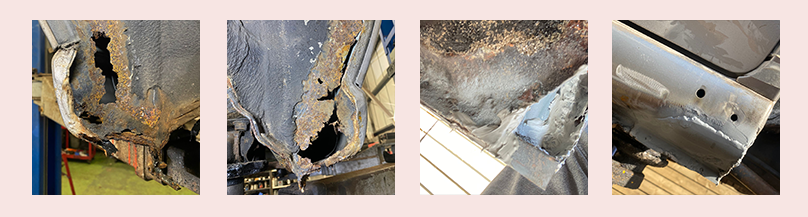
There were no inner or outer sills left with any solidity or good metal. The steps were non-existant and there was plenty of chassis, floor pan and arch issues too. This needed MAJOR surgery and several new panels to make her solid once more. Here's some Repairs & Preparation Pictures:
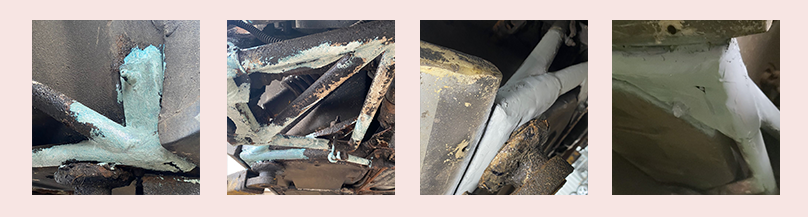
Once repaired and ready we applied our rustproofing treatment process and then cavity wax injected wherever possible. Vehicle allowed to dry before a bath to get ready to go home. This was one of those jobs where you felt a real sense of pride in the achievement. Here's some Post Treatment Pictures:
In typical jap car fashion the rot had started at the back wheel arches where they join the sills. Debris and damp had pooled and rotted the metal away so we had to cut out to good metal and create patches to repair. We always coat our repairs with a thick layer of seam sealer and zinc primer. In this case filler was needed to get the shape right as well. Here's a couple of Repair & Preparation Pictures:
Once all prepared and repairied we applied our rustproofing treatment process and then cavity wax injected wherever possible. Vehicle allowed to dry before a bath to get ready to go home. Here's some Post Treatment Pictures:
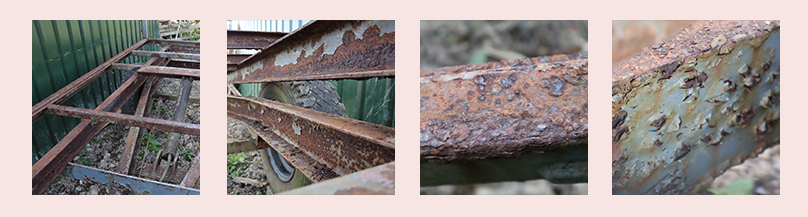
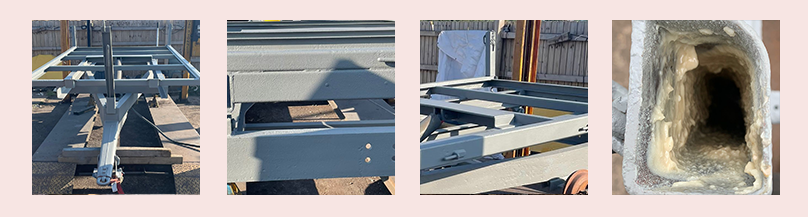
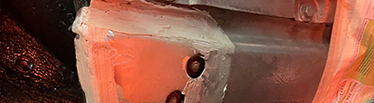
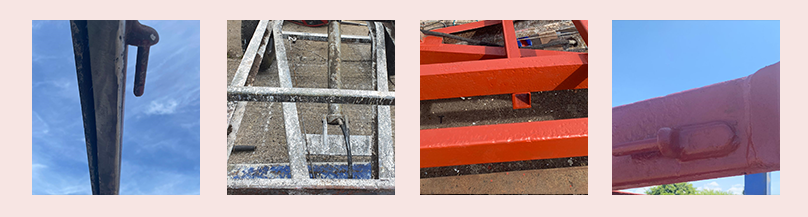
This one took a lot of preparation as it had ares with all different stages of corrosion. Most was flaky heavy surface corrosion but this left pitted and rough surfaces when removed. There were all sections where the metal was no longer structurally sound and disappeared with the air needling. We had a few areas where we fabricated repair sections and filled the pits. We applied rust converter to the whole trailer before applying a thick undercoat of zinc oxide paint. Here's some Repairs & Preparation Pictures:
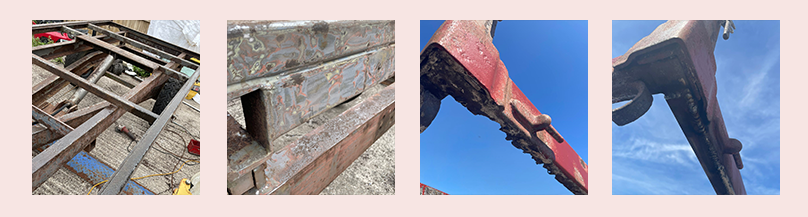
Once all fully dried this trailer was having all over tintable Raptor, colour matached to Massey Ferguson grey. Then we cavity wax injected wherever suitable into the box section. Trailer allowed to dry before a bath to get ready to go home. This was one of those jobs where you felt a real sense of pride in the achievement and we loved seeing the trailer with the tractor at pickup. Here's some Post Treatment Pictures: